

Can You Tighten Leggings Without Sewing Them?
Last Updated: November 2, 2026
Quick Summary
You can tighten leggings without sewing by threading new elastic through the existing waistband casing, which takes about ten minutes and lasts. For a one-minute temporary fix, pin a small fold of inner waistband fabric at each side seam with a safety pin, or fold the excess fabric inward.
- Measure the take-in amount by pinning the excess fabric at the side seams and checking the distance from the original seam.
- Thread elastic 1-1.5cm wide that is roughly 5-10cm shorter than the current waistband circumference.
- Cut a 2-3cm slit only on the inside layer of the waistband at the back seam to feed elastic through.
- Soak only the waistband in warm water around 30-40°C for 10-15 minutes, then lay flat to dry.
- Avoid heat entirely on bonded or seamless waistbands because it can cause delamination.
Table of Contents
- Quick Fixes to Tighten Leggings Waist in Minutes
- How to Tighten Leggings Waist Without Sewing
- Threading Elastic Through the Waistband Casing
- How to Sew Elastic Into Leggings Waistband
- How to Shrink Leggings Waist With Heat and Water
- How to Stop Leggings Rolling Down
- Choosing the Right Method for Your Leggings Fabric
- Fit Checks, Comfort and Durability After Alteration
- Shop Leggings That Hold Their Shape From the Start
- Frequently Asked Questions
Quick Fixes to Tighten Leggings Waist in Minutes
A loose waistband is one of the most common fit complaints in activewear, and it rarely has anything to do with your body. It usually comes down to fabric recovery and how the waistband was built. The good news: you can tighten leggings in minutes with tools you already own, and most fixes cost nothing at all.
This guide covers every practical route, from a one-minute safety pin fix to a permanent sewn alteration. We will also explain which methods suit which fabrics, so you do not ruin a good pair in the process.
Measuring Your Waistband Before You Start
Do not guess how much fabric to remove. Measure first.
Put the leggings on and pinch the excess fabric at the side seams. Mark where the fabric meets with a pin. Take the leggings off and lay them flat. Measure the distance between the original seam and your pin mark. That number is your take-in amount, and it should be split between both sides.
A few checks before you cut or sew:
- Waistband circumference: measure the relaxed waistband and compare it to your actual waist measurement. The gap is your target.
- Elastic type: feel for a flat elastic band inside the casing. Knitted or bonded waistbands behave differently from sewn casings.
- Seam allowance: check there is at least 1cm of fabric inside the seam before you plan any sewing.
- Stretch direction: stretch the band sideways. If it barely moves, it is a low-stretch band and needs a gentler fix.
Write your numbers down. Every method below works better with a measurement than with a guess.
How to Tighten Leggings Waist Without Sewing
The fastest no-sew fix is a safety pin threaded through the inner waistband to gather excess fabric. It takes under a minute, needs no tools beyond the pin, and reverses instantly if you get it wrong. This is the method we recommend trying first on any pair, because it tells you exactly how much fabric you actually need to remove before you commit to anything permanent.
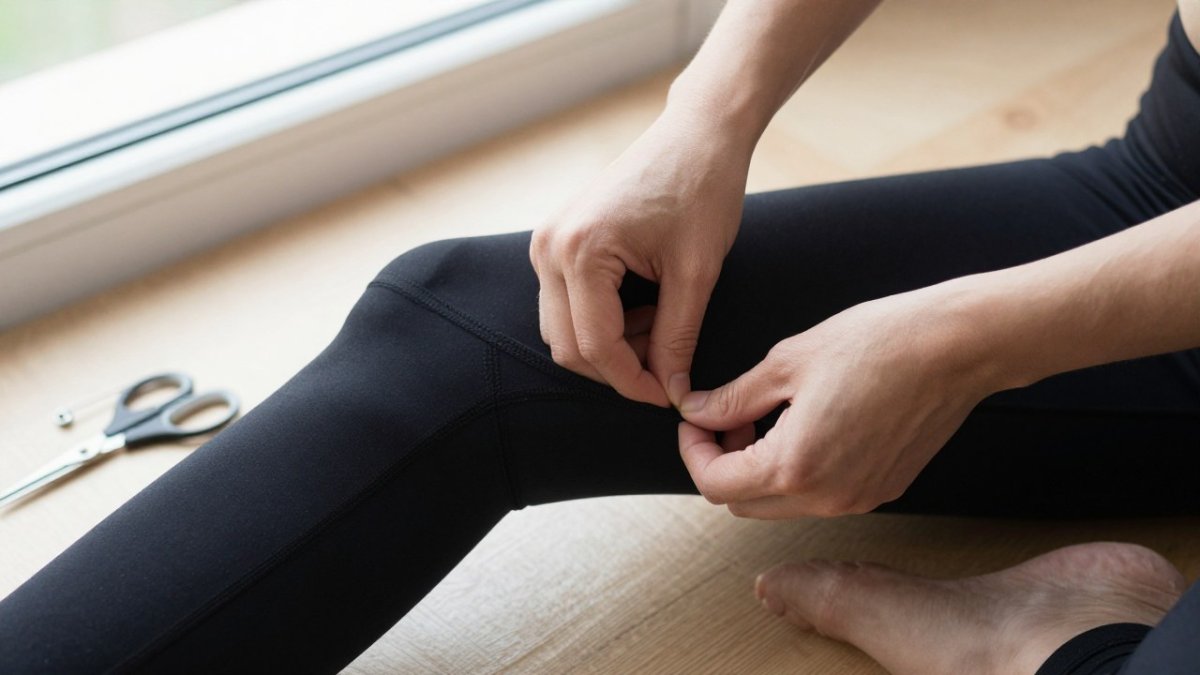
The Safety Pin and Clip Method
A safety pin works by creating a temporary pleat in the waistband. Turn the leggings inside out and find the inner waistband seam. Pinch a small fold of fabric at each side seam, then pin through both layers. Try them on before you pin the second side. Small adjustments beat big ones here.
Small clips work the same way and are easier to reposition. The drawback is comfort: a pin or clip against your hip will dig in during floor work or long sessions. Treat this as a temporary fix, not a permanent one.
Watch out: pinning through the outer fabric instead of the inner casing leaves a visible pucker and can snag the knit. Always pin the inside layer.
Folding and Pinching Excess Fabric
If you want a fix with no metal against your skin, fold the waistband inward instead. Pinch the excess fabric at the back or sides and fold it down flat against the inside of the band. A wide, flat fold distributes pressure better than a narrow pleat.
This works well under a loose top and holds reasonably well during yoga or walking. It will not survive burpees. For high-intensity training, use the pin method or move to an elastic fix.
Threading Elastic Through the Waistband Casing
Threading new elastic through the existing casing is the best no-sew method that actually lasts. It gives you a real waist adjustment, keeps the original outer finish, and takes about ten minutes.
Here is the process:
- Find the casing. Most leggings have a sewn channel inside the waistband. Check for an existing gap or a small opening at the inner seam.
- Cut a small slit. If there is no opening, cut a 2-3cm slit on the inside of the waistband at the back seam. Cut only the inner layer.
- Attach a safety pin to one end of your elastic and feed it through the casing, bunching the fabric as you go.
- Pull the elastic through until it exits the other side.
- Try the fit before securing anything. Pin the ends and test movement.
- Knot or stitch the elastic ends together once you are happy, then tuck them back inside the casing.
Use elastic that is 1-1.5cm wide. Narrower elastic rolls; wider elastic feels bulky under a fitted band. Choose a length roughly 5-10cm shorter than the current waistband circumference, then adjust.
Watch out: cutting the slit on the outer layer ruins the look of the leggings. Double-check which side you are cutting before the scissors go in.
How to Sew Elastic Into Leggings Waistband
Sewing elastic into the waistband is the most durable option and the one we would choose for a pair you train in weekly. It holds through washing and repeated stretching in a way that pins and folds simply cannot.
The method: open a section of the inner waistband seam, insert your elastic, and stitch it in place at both ends. Use a zigzag stitch rather than a straight one, because a straight stitch will snap the first time the fabric stretches. Backstitch at each end for security.
If the waistband has no casing, you can sew the elastic directly onto the inside of the band while stretching it slightly as you go. This gathers the fabric evenly and creates a snug fit without altering the outer seam.
A common mistake is sewing the elastic at full stretch. Sew it at roughly 80% stretch so the band still has room to move with you. Test the fit before you close the seam.
How to Shrink Leggings Waist With Heat and Water
Heat and water can tighten a waistband, but the result depends on the fibre blend and how the waistband was constructed. It is the least predictable method on this list.
How Heat Affects Different Fibres
Elastane (often labelled spandex or Lycra) is the component that gives leggings their stretch and recovery. When exposed to heat, elastane fibres contract slightly, which can reduce the waistband circumference. However, prolonged or high heat degrades the elastane permanently, leaving the fabric brittle and prone to sagging.
- High-elastane blends (nylon/elastane, polyester/elastane): These respond best to gentle warmth but are also the most vulnerable to heat damage. A short tumble on low heat is the maximum safe exposure.
- Cotton-blend leggings: Cotton fibres can shrink with heat and water, but the effect is uneven and may distort the waistband shape rather than tighten it evenly.
- Bonded or seamless waistbands: Heat can weaken the adhesive or bonding agents used in these constructions, causing delamination. Avoid heat entirely on bonded waistbands.
A Controlled Heat and Water Method
Instead of washing and drying the whole garment, target only the waistband. This limits the risk to the rest of the leggings.
- Check the care label first. If it says do not tumble dry or do not iron, do not apply heat.
- Fill a basin with warm water (around 30-40°C, comfortable to the touch but not hot).
- Submerge only the waistband for 10-15 minutes. Do not soak the entire leggings unless you want overall shrinkage.
- Remove and gently squeeze out excess water. Do not wring or twist, which can distort the elastic.
- Lay flat to dry in a warm room, or use a hairdryer on the cool setting held 15-20cm away, moving continuously for 2-3 minutes.
- Try the fit once dry. If there is no change, repeat once. If still no change, move to a mechanical method.
Watch out: applying direct heat from an iron or a hot hairdryer to elastane can melt or glaze the fibres, leaving a shiny, stiff patch that cannot be repaired.
What Heat Shrinkage Cannot Fix
Heat shrinkage is temporary, and the waistband will relax again after a few wears and washes. It also does nothing for a waistband that was cut too wide in the first place, or for a band that has lost recovery because the elastane is already degraded. If the waistband feels limp and stretched out before you start, heat will not restore it.
A safer alternative for a mild tightening is to soak only the waistband in warm water and lay flat to dry, as described above. This gives a small, temporary improvement without stressing the whole garment. For a permanent fix, move to threading elastic through the casing or a sewn alteration.
How to Stop Leggings Rolling Down
Rolling is a different problem from looseness, and it needs a different fix. A waistband rolls when the elastic is too narrow for the band width, when the fabric is too smooth against your skin, or when the band sits below your natural waist.
Fixes that work:
- Pull the band up to sit at your natural waist, not on your hips.
- Add width by threading a wider elastic through the casing.
- Check the rise: a low-rise band on a high-waist body will always roll.
- Avoid fabric softener on activewear, which coats the fibres and reduces grip.
For a deeper walkthrough, our guide on how to stop leggings sliding down covers the causes and fixes in more detail.
Choosing the Right Method for Your Leggings Fabric
Fabric and construction decide which method is safe. A fix that works on a thick compression legging can ruin a thin, smooth pair. This section explains how to read your leggings' construction and choose the right approach.
Identify Your Waistband Construction
Before you choose a method, turn the leggings inside out and examine the waistband. There are four common constructions:
- Sewn casing: A channel of fabric with elastic threaded inside. You can usually find a small opening at the inner seam. This is the easiest to adjust by threading new elastic.
- Bonded or glued waistband: Two layers of fabric bonded together with adhesive, often found in seamless or laser-cut leggings. There is no casing to open, and heat or cutting will damage the bond. These are best left to a professional alteration or replaced.
- Knitted-in elastic: The elastic is knitted directly into the band during manufacture. You cannot thread new elastic through it. A sewn alteration or a temporary pin/fold is the only DIY option.
- Fold-over or yoga waistband: A wide band of fabric that folds over. These can be tightened by adding a discrete elastic loop or by taking in the side seams.
Consider Lining and Pocket Panels
Many leggings have a lining (often a thin mesh or knit) inside the waistband, or pocket panels sewn into the band. These add layers that affect which method is safe:
- Lined waistbands: If you cut a slit to thread elastic, you must cut through both the outer band and the lining, or the elastic will sit between the layers and bunch. Always cut on the inside layer only and check you are not cutting through a pocket bag.
- Pocket panels: Leggings with a phone pocket in the waistband have additional stitching that can be weakened by stretching or cutting. Avoid threading elastic through a pocket panel; route it through the main casing instead.
Match the Method to the Fabric
| Fabric type | Best method | Avoid | Why |
|---|---|---|---|
| High-elastane compression (nylon/elastane blend) | Sewn elastic or threaded casing | Heat shrinking | Elastane degrades with heat |
| Thin seamless knit | Safety pin or fold | Cutting a slit | No casing to thread through |
| Cotton-blend leggings | Threaded elastic | Direct stitching | Fabric shifts under the needle |
| Bonded waistband | Professional alteration | Any DIY cut | No seam to reopen |
| Flared or bootleg styles | Fold or pin | Waistband surgery | Silhouette depends on the band |
A Decision Guide Based on Your Fit Problem
Not every loose waist is the same. Use this guide to choose the right fix:
- Waistband gapes at the back but fits at the hips: This is a classic loose waistband. A safety pin or threaded elastic will work. Measure the gap at the back and take in only that area.
- Waistband fits but rolls down during movement: The band is too narrow or sits below your natural waist. Try a wider elastic through the casing, or pull the band up. See our section on stopping leggings rolling down.
- Leggings are too big all over: Tightening the waist alone will create bunching at the crotch and hips. You need to take in the side seams or choose a smaller size. A waist-only fix will not solve an overall fit problem.
- Waistband is loose but the rise is too low: Tightening the waist will not raise the rise. You may need to alter the crotch seam or replace the leggings with a higher-rise style.
- Excess fabric bunches at the front: This often means the rise is too long for your body. A waist take-in can help, but check that the crotch line sits correctly after alteration.
Tools and Materials You Will Need
For most methods, gather:
- Safety pins (large, rust-proof)
- Small clips or basting pins
- Elastic (1-1.5cm wide for casings, 2-3cm for direct sewing)
- Scissors (sharp, small embroidery scissors work best)
- Sewing needle and thread (polyester thread, not cotton, for stretch fabrics)
- Sewing machine with a zigzag stitch (optional but faster)
- Tailor's chalk or a washable marker
- Tape measure
If you are weighing whether to alter or replace, our guide on how to choose sculpting gym leggings explains what a well-built waistband should feel like from the start.
Fit Checks, Comfort and Durability After Alteration
Test every alteration before you call it done. Put the leggings on and run through the movements you actually train in: a deep squat, a lunge, a forward fold, a few minutes of cardio.
What to check:
- No pinching at the waist or hip bones.
- No bunching at the crotch area, which usually means the take-in was uneven.
- No rolling when you sit down and stand up.
- No visible pucker on the outer seam.
- Comfort after 20 minutes, not just the first 20 seconds.
Durability matters too. Pins work loose. Knots slip. Stitched elastic holds. If you have altered a pair for heavy training, check the stitching every few washes.
A sloppy crotch line is the clearest sign an alteration went wrong. If the fabric pulls diagonally, you have taken in one side more than the other. Unpick and redo it.
Shop Leggings That Hold Their Shape From the Start
The best fix is a waistband that does not need fixing. Shoppers can also see which leggings are the highest quality. Readers considering shape-holding leggings can learn whether sculpting leggings actually work before buying. Our GrantB Sculpt Leggings are built with a supportive high waistband designed to stay in place during movement, in a 78% nylon, 22% elastane blend that delivers four-way stretch. They cost £34.99, and orders over £100 get £10 off with free UK delivery.

Frequently Asked Questions
Can you make a leggings waistband smaller without sewing?
Yes. The two most reliable no-sew options are a safety pin or small clip gathering the excess fabric at the back seam, and threading a short length of elastic through the waistband casing and knotting it. Both take under five minutes and are fully reversible. Pinch the fabric first to see how much you need to remove, then work on the back of the waistband so the gather sits out of sight.
Will washing or drying shrink leggings at the waist?
A hot wash and tumble dry can pull in a loose waistband slightly, but the effect is uneven and short-lived. Leggings made from nylon and elastane, like the GrantB Sculpt Leggings at £34.99, rely on elastane for stretch. Treat heat shrinking as a last resort for natural-fibre blends only, and never tumble dry performance leggings you want to keep supportive.
How do you stop leggings rolling down during a workout?
Rolling usually means the waistband is too loose or the rise is too short for your torso. First check the fit: a waistband should sit flat with no gap when you squat. If it still rolls, a small stitch at the centre back seam or a threaded elastic loop inside the casing adds grip. Avoid folding the waistband down, as this puts more pressure on a narrow band and makes rolling worse.
When should you replace leggings instead of altering them?
Replace rather than alter when the fabric has gone thin at the seat, the seams are fraying, or the waistband has lost all recovery and stays stretched after washing. Alterations work best on leggings with sound fabric and a waistband casing you can open. If the elastane has perished, tightening the waist only moves the problem to the legs, which will bag and sag during training.
A loose waistband is a solvable problem, whether you pin it, thread it, or sew it. But repeated alterations are a sign the garment was never built for your training in the first place. GrantB Sportswear designs gymwear with a high waistband that stays put, four-way stretch fabric that moves with you, and a sculpting fit that holds its shape through heavy sessions. Get started with GrantB Sportswear and train without adjusting your waistband mid-set.
