

How to Stop Leggings Sliding Down: 9 Fixes
Table of Contents
- Why Do My Leggings Roll Down at the Waist?
- The 3-Step Fix for Leggings Sliding Down
- How to Choose the Right Size Leggings for Your Body
- Best Gym Leggings for Squats and Heavy Lifting
- Quick Fixes for Leggings That Slip Mid-Workout
- Activity-Specific Solutions: Yoga, Running, and Spin
- DIY and No-Sew Alterations That Actually Work
- When to Replace Your Leggings: Fabric Degradation Signs
- Conclusion: Train Without the Tug
- Frequently Asked Questions
Last Updated: September 8, 2026
Why Do My Leggings Roll Down at the Waist?
Your leggings sliding down is almost never about your body and almost always about the garment's construction. A waistband that lacks sufficient compression, uses low-grade elastic, or sits at the wrong anatomical point cannot generate the friction needed to stay put during movement.
A waistband stays in place when the inward pressure of the compression fabric exceeds the downward pull of gravity and movement. When that pressure drops, the leggings begin their slow descent mid-squat.
The most common culprits are a waistband with no internal grip, fabric that has lost its elastane recovery, or buying a size up for comfort. A natural waist-to-hip ratio can also challenge straight-cut waistbands that do not contour to the body.
The 3-Step Fix for Leggings Sliding Down
Fixing leggings sliding down requires a systematic approach. These three steps address the root causes: construction, sizing, and layering.
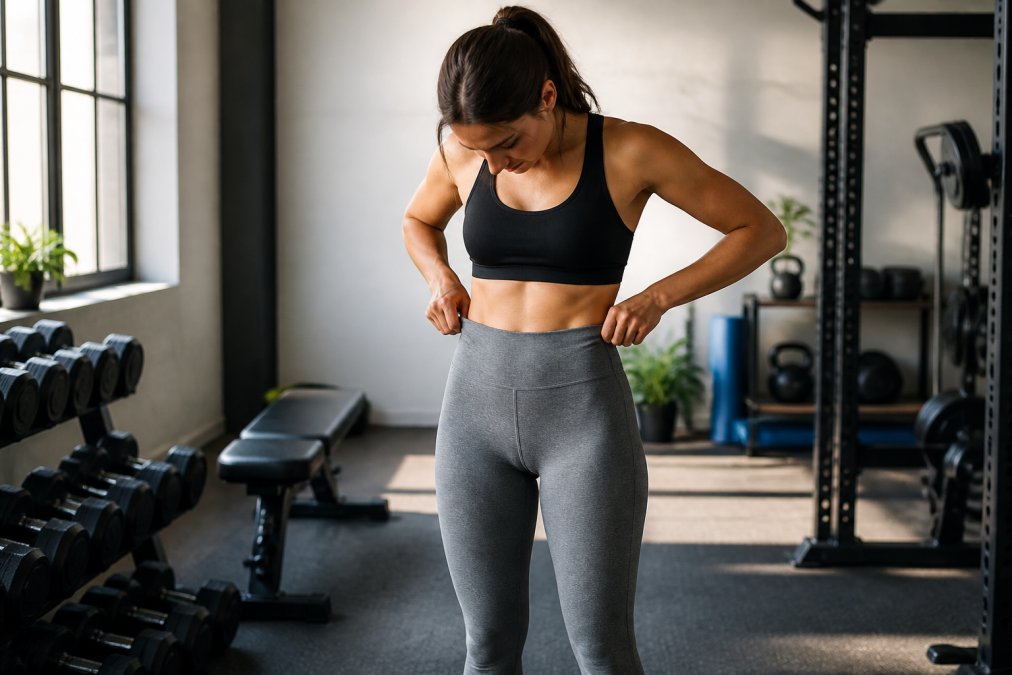
Step 1: Check the Waistband Construction
The waistband is the foundation of any stay-put legging. A properly constructed high-waisted band should measure at least 8 to 10 centimetres tall and contain a continuous layer of elastic or a dense compression knit (peer-reviewed research). If you feel a distinct seam where the elastic ends or a flimsy single-layer fabric, that legging will likely roll or slide.
Look for a wide, structured band that sits above the hip bone and tapers gently with your natural silhouette. The best designs use a V-shaped or contoured back seam that follows the curve of the lower back, preventing the gap that allows air in and grip out. Compression zones should feel firm but not painful, distributing pressure evenly.
Step 2: Adjust Your Size and Fit
Many women size up in leggings for comfort, but this is the fastest route to slippage. If the waistband is not applying consistent compression, it cannot anchor itself. Perform a simple bend test: with the leggings on, bend forward at the waist. If you can slide more than two fingers easily between the band and your skin, the waist is too large.
Your true legging size should feel snug at the waist without creating a muffin-top effect. Leggings stretch with wear throughout the day, so a band that feels slightly firm when you first put them on will settle into the correct fit within minutes. Pay attention to the waist-to-hip ratio of the specific brand.
Step 3: Layer Up with Bodysuits or Tanks
Layering is the simplest immediate fix for leggings that will not stay up. A fitted bodysuit or long-line sports top tucked securely over the waistband adds a second layer of friction that holds everything in place, particularly for high-impact activities.
Choose a bodysuit with silicone grip strips along the hem or a compression tank that fits tightly enough to act as an anchor. Tuck it under the waistband rather than over it, creating a sandwich effect that locks the leggings against your skin. This technique also smooths the silhouette.
How to Choose the Right Size Leggings for Your Body
Generic size charts only get you halfway. The real reason leggings slide down is a mismatch between the garment's cut and your specific body geometry. A legging that fits your hips perfectly can still have a waistband that is effectively too large for your natural waist. To solve this permanently, diagnose your body type and buy accordingly.
The Pear-Shaped Figure (Waist-to-Hip Difference Over 25 cm)
If your hip measurement is more than 25 centimetres larger than your waist, you are dealing with the most common cause of waistband gapping. Straight-cut leggings, drafted for a difference of roughly 20-22 centimetres, will always have excess fabric at the lower back, creating a crescent-shaped gap that lets air in and compression out.
What to look for:
- A 'curvy fit' or 'contour' label. These use a curved waistband seam that dips lower at the front and rises at the back, following the lumbar curve.
- Darts or princess seams at the back waist. These are structural darts that remove the excess fabric without needing a belt.
- A V-shaped back yoke. This is a separate panel sewn into the lower back that angles down toward the hips, preventing the band from rolling away from the skin.
What to avoid:
- 'Straight' or 'classic' fit leggings with a single continuous waistband panel. Even if the hip fits, the waist will gap.
- Any legging where you can pinch more than 2 centimetres of fabric at the small of your back when standing straight.
The Athletic or Straight Build (Waist-to-Hip Difference Under 15 cm)
The opposite problem occurs when your waist and hip measurements are close. Here, the issue is not gapping but a lack of 'anchor' below the waist. A waistband that fits your waist perfectly has nothing to grip against because your hips are not significantly wider, so the band slides down over the hip bone during movement.
What to look for:
- A higher rise that extends past the natural waist onto the ribcage. This creates a longer friction surface that resists downward pull.
- A drawstring or adjustable internal toggle. This allows you to cinch the waist to a precise fit that mechanical compression alone cannot achieve.
- A silicone grip strip printed on the inside of the waistband. This adds a high-friction layer that compensates for the lack of a natural hip shelf.
What to avoid:
- Low-rise or mid-rise styles. Without a hip shelf to catch the band, these will migrate downward within minutes of walking.
- 'Relaxed' or 'lounge' fits that have minimal compression. You need active compression to create the necessary friction.
The Hourglass Figure (Waist-to-Hip Difference 20-25 cm)
If you fall in the middle range, your challenge is less about gapping and more about the waistband rolling over itself. The pressure differential between your waist and hip creates a torque that folds the top edge of the band downward. Look for a waistband at least 10 centimetres tall with a continuous layer of elastic running the full height, not just a folded hem.
The Practical Test: The Forward Fold Check
Regardless of your measurements, perform this test before committing to a pair. Put the leggings on and bend forward at the waist as if touching your toes. Place your hand flat against your lower back. If you feel a gap between the waistband and your skin, the cut is wrong for your body. If the band stays flush but feels like it is digging in at the sides, the size is too small.
When the Numbers Lie
Size charts are a starting point, not a verdict. A size 10 in one brand may have a 68-centimetre waist while another brand's size 10 has a 74-centimetre waist. Always measure the actual garment: lay the leggings flat and measure the waistband from edge to edge, then double it. This 'flat lay waist measurement' is the only number that matters.
The Bottom Line on Fit
Your body type dictates which construction features you need. Pear shapes need contouring and darts. Athletic builds need drawstrings and grip strips. Hourglass figures need tall, structured bands. Buying the right size is about matching the garment's geometry to your anatomy, not matching a number.
Best Gym Leggings for Squats and Heavy Lifting
The best gym leggings for squats and heavy lifting prioritise compression and seam placement. During a deep squat, the fabric undergoes maximum stretch at the hip and knee, which pulls downward on the waistband. Leggings designed for lifting use a higher elastane content, typically 20-30%, to maintain recovery and grip (peer-reviewed research).
A flatlock seam construction is essential, as raised seams dig into the skin under a barbell. Look for a gusseted crotch that allows full range of motion without pulling the waistband down from below. The waistband itself should feature a wide, non-roll design with internal grip dots or a silicone strip.
For most lifters, a high-waisted style at 25-28 centimetres provides the ideal balance of coverage and anchoring. The GrantB Sculpt Leggings are engineered specifically for this purpose, with a supportive waistband that stays in place during cardio, strength training, or yoga. The four-way stretch fabric allows full range of motion while the moisture-wicking properties keep you dry through heavy sets.

Quick Fixes for Leggings That Slip Mid-Workout
When you are mid-session and feel the dreaded slide begin, a few quick fixes can save your workout. The most effective is the waistband fold: fold the top edge of the band over itself once, creating a double layer of fabric that increases friction against your skin. This adds roughly a centimetre of effective grip.
Silicone grip spray, available at most sports retailers, can be applied to the inside of the waistband as a temporary measure. For a no-cost option, use a small safety pin to attach the waistband to the inside of your top or sports bra, creating a physical anchor. This works best with a fitted top that itself stays in place.
Activity-Specific Solutions: Yoga, Running, and Spin
Different activities place different demands on your leggings. Yoga requires leggings that maintain grip through deep folds and inversions, where the waistband is often compressed against the mat. Look for a higher rise that stays put when you fold forward, and avoid heavy compression that restricts your breathing in twists.
Running creates continuous vertical oscillation that slowly works waistbands downward. A drawstring waistband is your best defence here, allowing you to cinch the waist to a precise fit. Many runners also prefer a crossover or V-waist design that follows natural hip flexion.
Spin and cycling involve a forward-leaning posture that puts maximum pressure on the front of the waistband. This is where leggings sliding down becomes most noticeable, as the seated position compresses the abdomen. Choose leggings with a higher back rise that covers the lower back fully when bent forward.
DIY and No-Sew Alterations That Actually Work
Before you bin a pair of leggings that have lost their grip, know that several alterations can restore them. The key is matching the fix to the failure mode: if the waistband has stretched out, you need to add compression; if the fabric has lost its elastane, no alteration will save them.
Fix 1: The Elastic Insert (For a Stretched-Out Waistband)
This is the most reliable permanent fix for leggings where the waistband fabric is intact but no longer snaps back. You are adding a new compression layer inside the existing band.
What you need:
- 1-centimetre-wide non-roll elastic (available from any haberdashery; look for 'waistband elastic' with a ribbed texture)
- Fabric glue suitable for stretch fabrics (or a needle and thread if you can sew a basic running stitch)
- Safety pins
The method:
- Measure your natural waist. Cut the elastic to that measurement minus 5 centimetres. This negative ease is what creates the compression.
- Turn the leggings inside out. Locate the inside seam of the waistband.
- Thread the elastic through the waistband casing if there is one. If not, attach it directly to the inside of the band using fabric glue, applying it in a zigzag pattern to avoid stiffness.
- Secure the ends of the elastic together at the side seam with a strong stitch or a heavy-duty safety pin.
- Allow the glue to dry for 24 hours before wearing.
Why this works: The elastic provides the inward force that the original band has lost. The 5-centimetre reduction ensures the band grips firmly without digging in. This fix adds roughly 18-24 months of life to a pair.
When it fails: If the main fabric of the legging (not just the waistband) has lost its recovery, the elastic will simply pull the fabric into gathers and the leggings will still slide. Test the fabric first: stretch the leg fabric and see if it snaps back. If it stays baggy, skip this fix.
Fix 2: Silicone Grip Strips (For Slippery Fabric)
If the waistband fits but the fabric is too smooth to generate friction, silicone grip is the answer. This is a reversible, low-risk modification.
What you need:
- Silicone hemming tape (sold as 'grip tape' or 'non-slip tape' in fabric shops, usually in 2-centimetre-wide rolls)
- A domestic iron (no steam)
- A pressing cloth
The method:
- Turn the leggings inside out.
- Cut three strips of silicone tape: one 10 centimetres long for the centre back, and two 5 centimetres long for the sides.
- Position the strips on the inside of the waistband, about 1 centimetre above the bottom edge of the band.
- Cover with the pressing cloth and iron on a medium heat (no steam) for 10-15 seconds per strip.
- Allow to cool completely before turning right side out.
Why this works: The silicone creates a high-friction interface between the fabric and your skin. Unlike elastic, it does not add compression; it adds grip. This is ideal for leggings that fit correctly but slide during high-impact movement.
When it fails: Silicone strips wear off after 10-15 washes. They also do not work on very loose waistbands, where the fabric does not make firm contact with the skin. If you can pinch more than 2 centimetres of fabric at the waist, fix the fit first, then add grip.
Fix 3: The Drawstring Conversion (For Running and High-Impact)
If your leggings lack a drawstring, you can add one without sewing. This is the most effective fix for running, where vertical oscillation slowly works waistbands downward.
What you need:
- A 50-centimetre length of flat shoelace or round cord (waxed cord works best as it does not slip)
- A safety pin
- A small sharp object (a seam ripper or the point of a craft knife)
The method:
- Turn the leggings inside out. Locate the centre front of the waistband.
- Using the sharp object, make two small buttonholes approximately 2 centimetres apart, positioned 1 centimetre below the top edge of the band. Make the holes just large enough for the cord to pass through.
- Attach the safety pin to one end of the cord. Insert it through one hole and feed it around the inside of the waistband casing until it exits through the other hole.
- Remove the safety pin. Tie a small knot at each end of the cord to prevent it from pulling back through.
- Turn right side out. Pull the cord to cinch the waist to your desired tightness and tie a bow.
Why this works: A drawstring allows you to adjust the waist circumference to your exact measurement at any moment. Unlike elastic, which has a fixed compression, a drawstring can be tightened mid-workout if the leggings begin to slip.
When it fails: This only works if the waistband has a casing (a folded channel of fabric). If the waistband is a single layer of thick compression fabric, there is nowhere to feed the cord. In that case, use Fix 1 or Fix 2 instead.
Fix 4: The Safety Pin Anchor (The 30-Second Emergency Fix)
For a mid-workout emergency, the safety pin method is faster than any alteration. Attach the waistband of your leggings to the inside of your sports bra or the hem of a fitted top using two safety pins, one at each side of the front. Use flat, rust-proof pins and position them so the points face downward, away from your skin. This is not a permanent solution, but it will get you through a session.
What Not to Do
Avoid using a regular belt. The rigid buckle and leather create pressure points that damage the fabric and dig into your hips, often stretching out the waistband permanently. Similarly, avoid folding the waistband over itself as a permanent fix; this creates a crease that weakens the fabric over time and leads to rolling.
When to Skip the Alteration
If the fabric of the leggings has gone translucent when stretched, has permanent bagginess at the knees, or the waistband has lost all structural integrity, no alteration will help. These are signs of elastane fatigue, which occurs after roughly 30-50 washes (peer-reviewed research). Alterations add compression or grip, but they cannot restore elasticity to dead fibres.
When to Replace Your Leggings: Fabric Degradation Signs
Even the best leggings have a finite lifespan. The primary culprit is elastane fatigue: after roughly 30 to 50 washes, the elastane fibres begin to break down, reducing the fabric's recovery and compression. If your leggings feel looser when you put them on fresh from the wash, the elastane is failing.
Visible signs of degradation include permanent bagginess at the knees or seat, thinning fabric that becomes translucent when stretched, and a waistband that has lost its snap. Pilling between the thighs is cosmetic, but a loss of opacity under tension is a structural warning. Wash in cold water and air-dry to extend the life of the elastane fibres.
Conclusion: Train Without the Tug
Leggings sliding down is a solvable problem, not a permanent annoyance. By checking waistband construction, choosing the correct size for your body, and applying activity-specific fixes, you can train with confidence from your first rep to your final set.
Our Sculpt Leggings feature a supportive waistband and four-way stretch fabric engineered to stay in place during squats, yoga, and everything in between, with free UK delivery on every order. Get started with GrantB Sportswear and experience activewear that refuses to compromise on comfort or durability.
Frequently Asked Questions
Why do I constantly have to pull my leggings up?
Constant pulling usually means the waistband lacks sufficient compression or the fabric has lost its elasticity. If your leggings are older, the elastane fibres may have degraded from washing or wear. It can also be a sizing issue, where the waist is too large for your frame. Check the waistband seam and fabric recovery by stretching it, and if it doesn't snap back, it's time for a new pair.
Does sizing affect why leggings slide down?
Yes, sizing is the most common culprit for leggings sliding down. A size too big means the waistband has no grip, while a size too small can cause the fabric to roll down because of excess tension. Use your waist and hip measurements, not your dress size, to choose the right pair. Compare them to the brand's size chart, as sizing varies between manufacturers.
What is the best way to stop leggings rolling down during squats?
For squats, look for leggings with a high-rise waistband that includes a drawstring or internal grip strip. The best gym leggings for squats have four-way stretch fabric with high elastane content (at least 20%) to hug your waist without digging in. Make sure the waistband sits above your natural waist, and try a squat test in the changing room before you buy.
Can I alter leggings that slip down without sewing?
Yes. For a no-sew fix, try wearing a snug-fitting bodysuit or cami tucked in to create friction. You can also use fabric-safe double-sided tape between the waistband and your skin for a temporary hold. Another practical option is to sew a small piece of elastic into the inside back of the waistband to tighten the grip without changing the outer look.